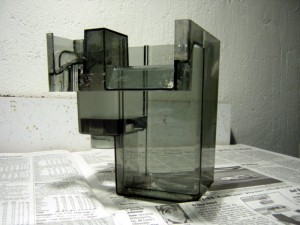
Once upon a time I had a 2.5 gallon nano reef tank and I wanted to add a refugium to it to grow macro algae. Being such a small tank it did not make sense to set up a smaller tank to act as a refugium like some people do for larger reef tanks. So, I came up with the idea of adding a refugium to the small power filter that provided water movement to the tank.
I really like AquaClear power filters. I find that they are much more versatile than other brands and they are very easy to modify. Plus, they just work well. These instructions are geared toward AquaClear power filters but other brands may work too. Besides the filter, you will need a sheet of acrylic, an acrylic cutter, hacksaw, or Dremel tool to cut the acrylic, and some sort of glue.
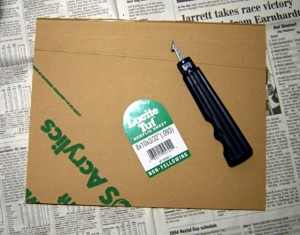
Most large hardware stores carry sheets of acrylic to replace broken windows. The sheets of acrylic come with paper on each side to protect the plastic from scratches. You can take this off now, or wait until after you cut it. Acrylic scratches easily. Acrylic cutters can be found at hardware stores next to the acrylic sheets.
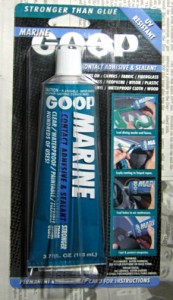
For glue, you need something that is non-toxic when cured and that will bond acrylic. Silicone does NOT bond acrylic well. The best thing I have found is Marine Goop. Many places carry it. All purpose household Goop may work but I like the Marine Goop because it is meant for use in water. Other glues may work.
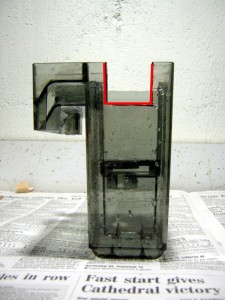
The first step is to cut an opening in the side of the power filter. Water will flow through this opening into the refugium. You want to make the cut on the side of the filter opposite the impeller and intake tube. You can cut the plastic body of the filter with an acrylic cutter (not very easy), hacksaw (somewhat easy), or Dremel tool with cutting wheel (easy). A larger opening will provide better flow in the refugium but will take away usable space in the filter itself and the refugium. Think about this before cutting. It is difficult to make this opening larger once everything has been glued into place because there will not be much room to work.
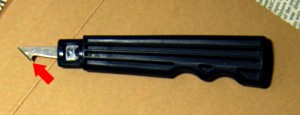
Next, measure and cut your acrylic sheet. You will need 4 pieces; 1 for the front, 1 of equal size for the back, 1 for the side, and 1 for the bottom. To cut the acrylic with an acrylic cutter, use the cutter to score a groove in the acrylic then place the sheet on a hard, flat surface with the groove on the edge of the surface and part of the sheet hanging off the edge. Press down on the part of the acrylic that is on top of your surface to hold it in place. Then, quickly snap the free-hanging piece of acrylic down. The sheet should break cleanly at your groove. What I do, and this may not be the correct way, is I use the little notched end of the cutting tool (see photo below) and drag that across the acrylic several times to create a nice, fairly deep groove then snap the acrylic. This works well for me.
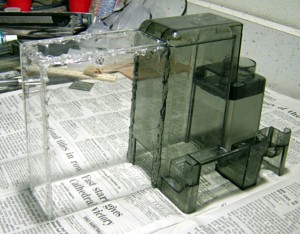
Glue your pieces of acrylic onto the power filter. You may have to do this in steps, letting your previous work cure before gluing on more pieces. Since I knew you would not be able to see the refugium when viewing the aquarium normally, I really pilled on the glue without much regard for asethetics.
Let the glue dry completely before testing. You can hook up the filter and let it run in a bucket of water or spare aquarium to test it out. You may want to let it run like this overnight to check for leaks and to allow any harmful chemicals to leach out of the glue. I have used Marine Goop in both freshwater and saltwater aquariums without any problems but I can’t guarantee that it is safe. Use it at your own risk.
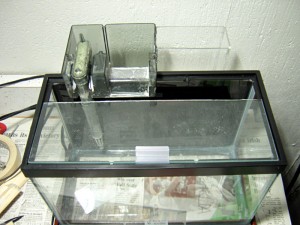
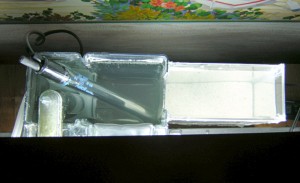
Once tested, you can put your new filter/refugium on your tank and fill it with whatever you want. This refugium could also serve as additional space for filter media. Water passively flows into and out of the refugium so biological filter media would work well but mechanical filter media would not.
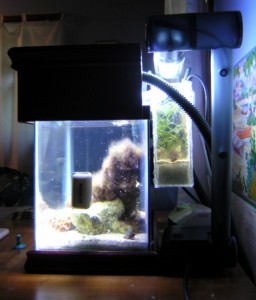
I have found that this refugium works quite well given its size. Water flow into and out of the refugium is OK, but a little low, with the size of opening that I cut. You may want to experiment with a larger opening or cutting multiple holes. Gook luck!

Nice build!! Just wondering what light you used over the top or the fuge? I’ll shoot you some pics when I get done with my setup. Thanks for the good idea.
I just used a 13 watt compact fluorescent desk lamp. Seemed to work ok, not great, but ok.
Have you ever thought about writing an ebook or guest authoring
on other sites? I have a blog based on the same subjects you discuss
and would love to have you share some stories/information. I know my visitors would enjoy your work.
If you are even remotely interested, feel free to shoot me an e-mail.