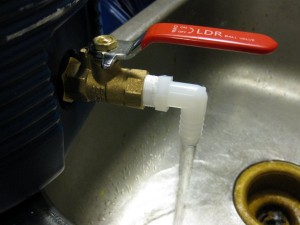
I make homebrewed beer from time to time and have been doing partial mash brewing lately. I found a nice article detailing the process. It isn’t too difficult and gives better results than all extract brewing. The processes involves steeping malted barely in a 2 gallon beverage cooler then transferring, via the spout on the cooler, this wort to a brew pot to boil. Well, the spout on my beverage cooler have very good flow and I had to keep the little button depressed while the hot wort flowed out of the cooler and always burns my finger. Not cool. So, I decided to replace the spout with a more robust version. This is not a very difficult project but I thought I’d share anyway. Total cost for this project was about $10 plus the cost of the cooler.
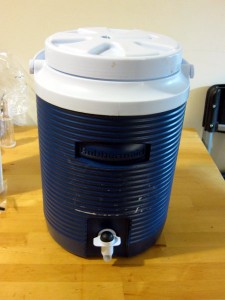
The original spout is held in place by a plastic nut on the inside of the cooler. It isn’t too hard to loosen the nut and remove the spout. There is a rubber gasket between the nut and the cooler’s inner wall. You’ll want to keep this part and reuse it. The thread of the old spout is 3/8″. The new spout is made of a 3/8″ bronze ball valve, two 3/8″ bronze lock nuts, a 3/8″ male-male threaded bronze connector, and a nylon hose barb to MIP elbow (the barb is 1/2″, the thread is 3/8″). You’ll also want some plumber’s helper (teflon tape).
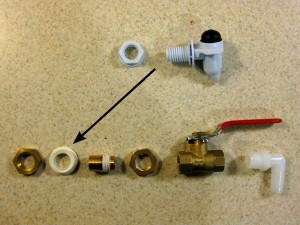
The nylon elbow goes into one end of the valve (with teflon tape). Put teflon tape on one end of the male-male connector and tighten one nut on this as far as it will go. Screw this into the other end of the valve. Put this assembly into the hole in the cooler, replace the gasket on the inside of the cooler, and tighten the other nut on the part of the male-male connector poking into the inside of the cooler. You don’t need teflon tape on this end. Tighten the nut so it makes a nice seal with the gasket.
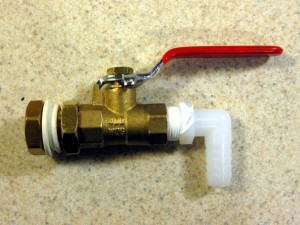
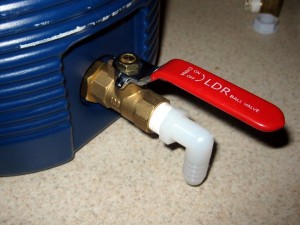
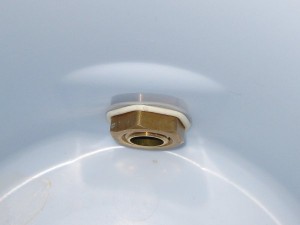
The new spout has much better flow and can operate hands-free, which is nice. The barbed end of the elbow allows for a 1/2″ ID hose to be attached to the spout, if needed. It didn’t take long to do this conversion and I am quite happy with the results. Happy brewing!
