
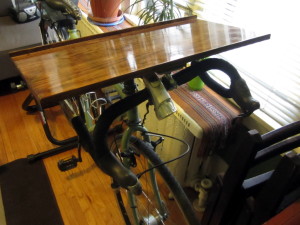
My fiancee likes to ride her bicycle on a trainer indoors during winter. She thought attaching a desk to the bike would be a great idea so she could use her computer or read while she rode but she wasn’t sure how to do it. I gave it some thought and figured out a clever way to make it happen. Read on for details or skip below to see the video.
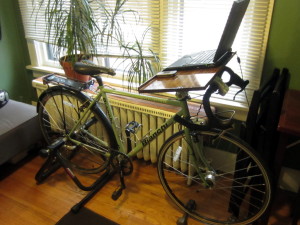
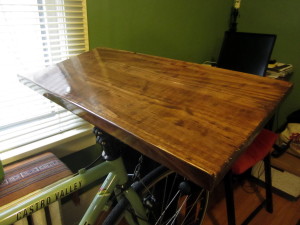
I got a 12″x24″ piece of hardwood, added a strip of 1″ wood to the front, sanded it, stained it, and sealed it with polyurethane. The extra strip of wood holds objects on the desk when it isn’t angled perfectly flat.
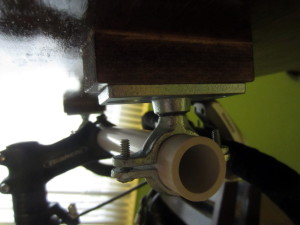
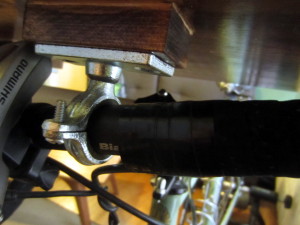
The desk is attached to the bike via a piece of 3/4″ ID PVC that sits on the stem in place of the handlebars. This size pipe is almost identical in size to her handlebars. Some handlebars are different size so be sure to measure yours before buying pipe.
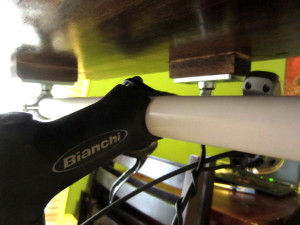
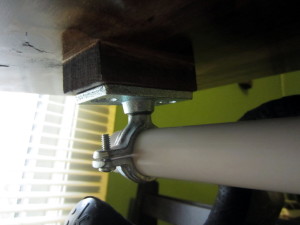
The PVC is attached to the underside of the desk with two 3/4″ pipe hangers and hanger plates screwed onto extra pieces of wood. This allows for about an inch or two of clearance between the PVC and the underside of the desk. The hangers must be threaded onto the plates with 3/8″ threaded rod or a 3/8″ bolt with the head cut off. I epoxied all of this together for added strength with JB Weld.
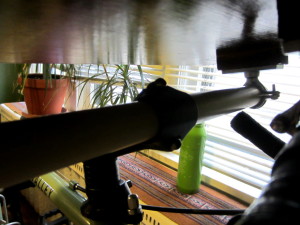
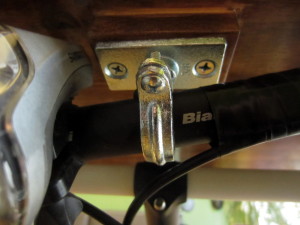
In front of the PVC is another hanger and block of wood which holds the handlebars while the desk is on the bike. This keeps the handlbars secure and prevents us from having to disconnect any cables to use to desk. This makes switching between normal handlebars and the desk very easy and fast.
I think the desk turned out very well. It wasn’t too hard to build and wasn’t very expensive. If you build one, I’d love to see some photos! You can send them here or post a Youtube video response.
Hi Friend
I really appreciate the way you teach, after weeks trying to find someone to advice me how to make a bike tire belt,…. I found you…, Im glad because I know some people who are working on this art but they always avoid my questions about it, it seems to me that they want to keep the secret not telling anyone how to make it…..well from now Im not going to waste my time to tell them to teach me,,,,,! you are the solution! because of that I will encourage my daughter and son to work on this project which is not complicate and inexpensive..
.God bless you forever
regards
ramon
Love your site Excelent Ideas